 Android - 追蹤碼
SDK導入說明
加入ClickForce追蹤碼前,需先下載Android SDK檔案,即進行解壓縮程序,包含了一個jar檔,並完成以下前置步驟:
A.在本追蹤碼廣告專案中加入 MFAD-*.*.*.jar
B.加入Google Play Service
C.設定AndroidManifest.xml
基本設定
引入SDK
在 Android Studio 專案中加入 MFAD-*.*.*.jar
1. 複製解壓縮的 JAR 檔貼上到 libs 資料夾
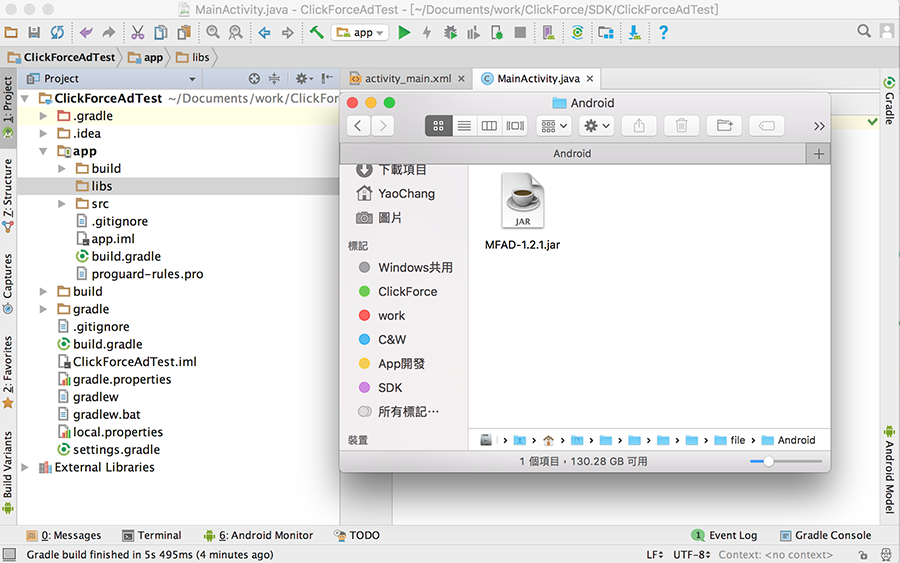
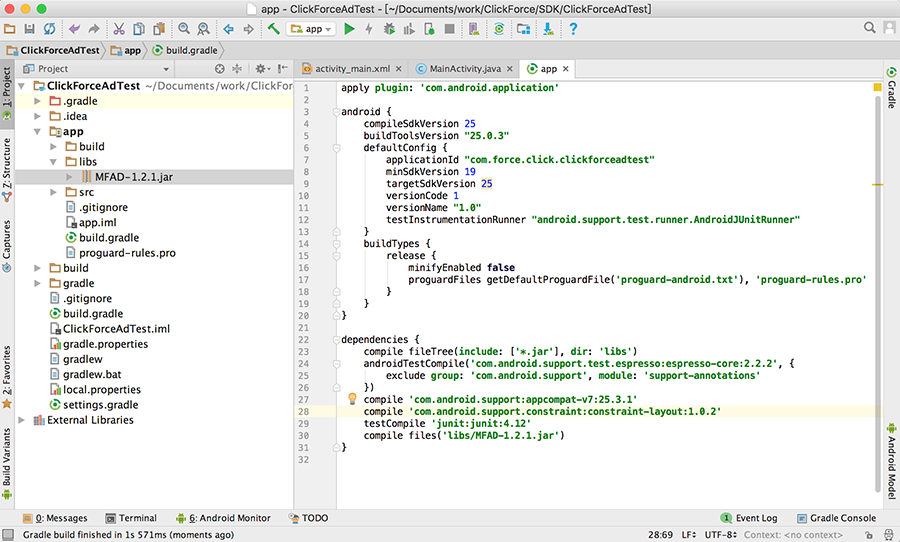
2. 回到 Android 專案,libs 會多出一個 JAR 檔案,對它按下右鍵選擇Add as library 。之後可至 build.gradle 確認是否有加入成功。
如範例顯示,將會有一行 compile files(‘libs/MFAD-*.*.*.jar’) 表示 JAR 被讀到了
加入Google Play Service
在 Android Studio 專案層級的 build.gradle 中,加入Google Mobile Ads SDK。並請加入maven指令。
        .
        .
        ..
        ...
        versionName "1.0"
        testInstrumentationRunner "android.support.test.runner.AndroidJUnitRunner"
    }
    buildTypes {
        release {
            minifyEnabled false
            proguardFiles getDefaultProguardFile('proguard-android.txt'), 'proguard-rules.pro'
        }
    }
}

allprojects {
    repositories {
        jcenter()
        maven {
            url "https://maven.google.com"
        }
    }
}

dependencies {
    compile fileTree(include: ['*.jar'], dir: 'libs')
    androidTestCompile('com.android.support.test.espresso:espresso-core:2.2.2', {
        exclude group: 'com.android.support', module: 'support-annotations'
    })
    compile 'com.android.support:appcompat-v7:25.3.1'
    compile 'com.android.support.constraint:constraint-layout:1.0.2'
    compile 'com.google.android.gms:play-services-ads:17.2.0'
    testCompile 'junit:junit:4.12'
    implementation files('libs/MFAD-2.0.4.jar')
}
Note: 可查看 Setting Up Google Play Services,瞭解如何設定 Google Play Services SDK。 建議使用最新版Google Play Services,以支援所有功能。
設定AndroidManifest.xml
INTERNET必要。用來存取網路,以發出廣告請求。
ACCESS_NETWORK_STATE必要。用來在發出廣告請求前,先行檢查是否有可用的網路連結。
ACCESS_FINE_LOCATION必要。允許訪問粗略性位置,以取得地理相關的廣告。
ACCESS_COARSE_LOCATION必要。允許訪問粗略性位置,以取得地理相關的廣告。
加入至 AndroidManifest.xml 中
    <uses-permission android:name="android.permission.INTERNET" />
    <uses-permission android:name="android.permission.ACCESS_NETWORK_STATE" />
    <uses-permission android:name="android.permission.ACCESS_FINE_LOCATION" />
    <uses-permission android:name="android.permission.ACCESS_COARSE_LOCATION" />
加進參考 Google Play 服務版本的 <meta-data> 代碼,Android 可藉此瞭解應用程式預期要用的服務版本。
由於Google Play Services 17.0.0 開始需在 <meta-data> 代碼裡加上 AD_MANAGER_APP,如下圖第二段 meat 代碼內。
   <application
        android:allowBackup="true "
        android:icon="@mipmap/ic_launcher "
        android:label="@string/app_name "
        android:roundIcon="@mipmap/ic_launcher_round "
        android:supportsRtl="true "
        android:theme="@style/AppTheme ">
        <activity android:name=".MainActivity ">
            <intent-filter>
                <action android:name="android.intent.action.MAIN " />

                <category android:name="android.intent.category.LAUNCHER " />
            </intent-filter>
       </activity>
	<meta-data
	   android:name="com.google.android.gms.version"
	   android:value="@integer/google_play_services_version"/>
	<meta-data
	   android:name="com.google.android.gms.ads.AD_MANAGER_APP"
	   android:value="true" />
    </application>
加進參考 Google Play 服務版本的 <meta-data> 代碼,Android 可藉此瞭解應用程式預期要用的服務版本。
   <application
        android:allowBackup="true"
        android:icon="@mipmap/ic_launcher"
        android:label="@string/app_name"
        android:roundIcon="@mipmap/ic_launcher_round"
        android:supportsRtl="true"
        android:theme="@style/AppTheme">
        <activity android:name=".MainActivity">
            <intent-filter>
                <action android:name="android.intent.action.MAIN" />

                <category android:name="android.intent.category.LAUNCHER" />
            </intent-filter>
       </activity>
       <meta-data
           android:name="com.google.android.gms.version"
           android:value="@integer/google_play_services_version"/>
    </application>
開始建立 追蹤碼
追蹤 設定與說明
開始追蹤
void sendTracker(Context context, String zoneId)
選擇回傳對象
void sendTracker(Context context, String zoneId, TargetType targetType)
| 回傳對象 | TargetType 常數值 |
|---|---|
| 全部 | ALL |
| 域動 | CLICKFORCE |
| 中華 | CHNGHWA |
宣告及引入
加入追蹤碼會用到程式碼如下:
public class MainActivity extends Activity {
    private AdView ad ;

    @Override
    protected void onCreate(Bundle savedInstanceState) {
 	super.onCreate(savedInstanceState);
	setContentView(R.layout.activity_main);
	ClickForceAnalytics.sendTracker(this, "1234");
	// Option
	// ClickForceAnalytics.sendTracker(this, "1234", TargetType.ALL);
    }
}
show date